

WLP Summer Newsletter
Total Transformation
Behind the Scenes View
Building a Dream House
Before
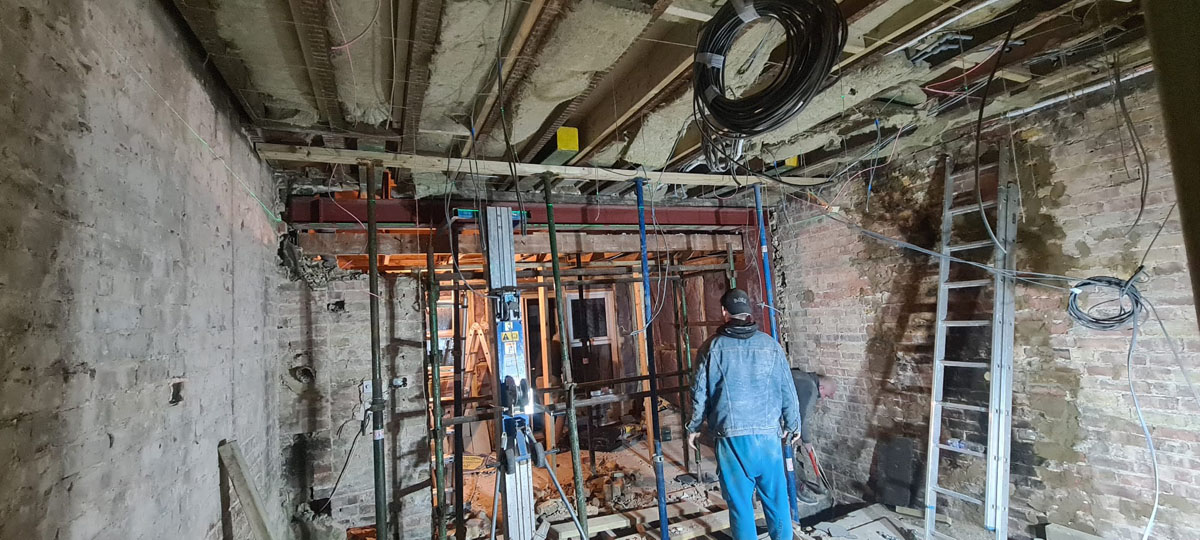
A lot of building work is dirty, dusty, noisy and physically demanding. The finished product hides most of the work and processes that go into creating it. Walls and ceilings are boarded, plastered and painted, floors are carpeted or tiled, pipework and cabling are hidden, and structural work is boxed in. This often gives the client or homeowner only a limited view of the skill and effort required to create their perfect home.
This newsletter celebrates the skill, passion and hard work needed to deliver a high-quality finished project. Many hours of planning and organisation go into a project like this, from working with structural engineers, planning consultants and architects to coordinating subcontractors and suppliers.
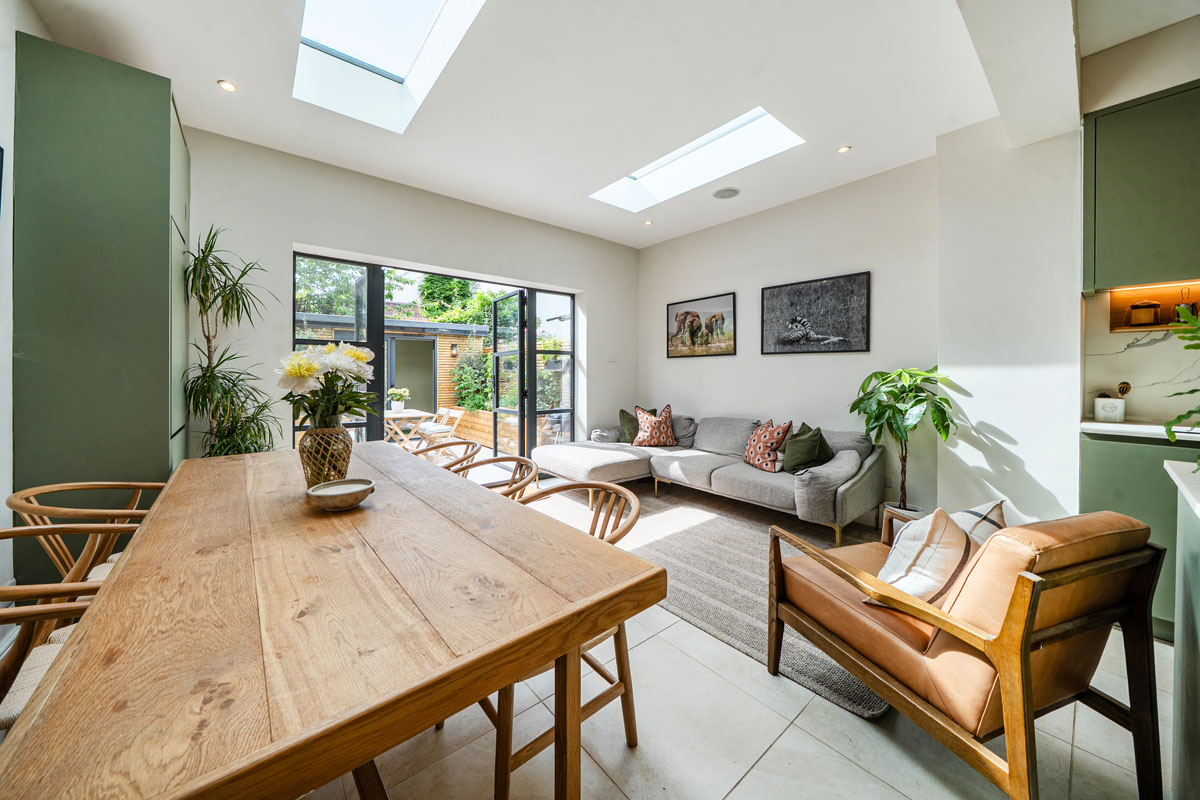
In this edition, we look at the before-and-after photos and highlight some of the key stages involved in completing this beautiful home, built by Wrigley Landon Properties Ltd in 2025.
After
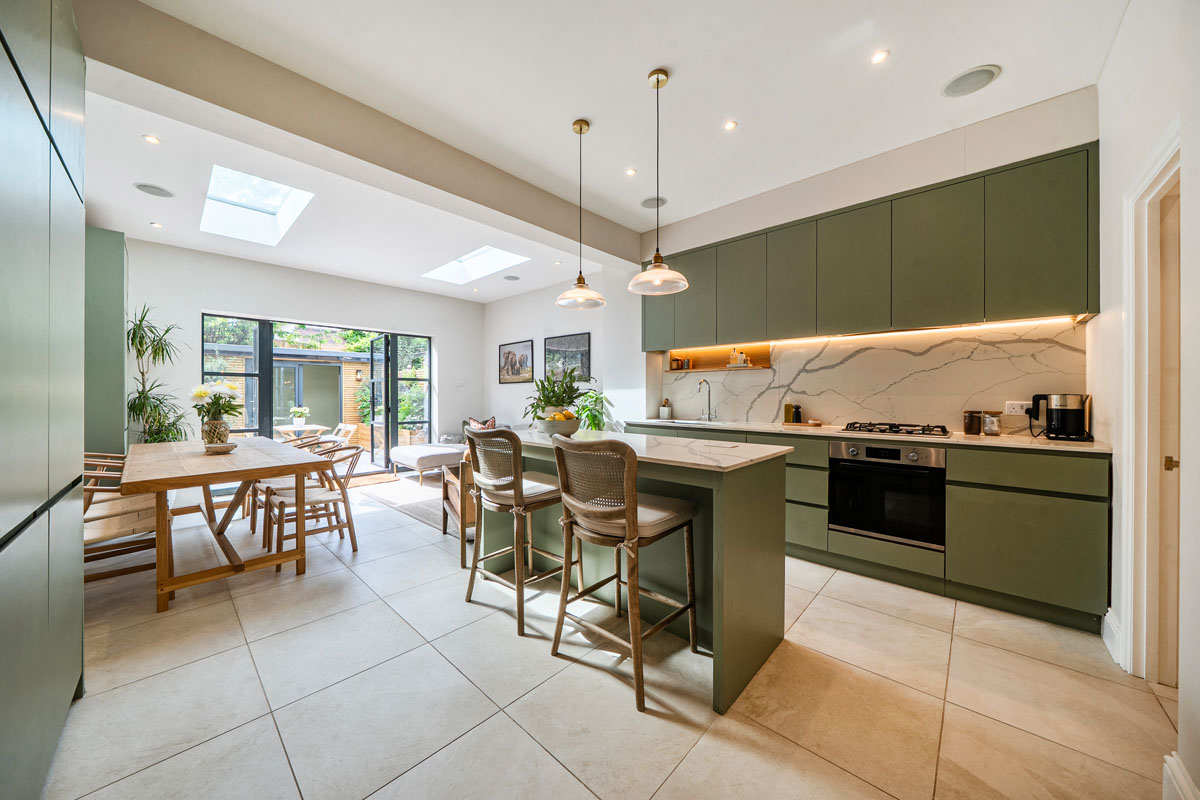
Before and After
The hidden work behind every finished room
The first task on any major renovation is often the strip-out, removing all the old materials and finishes from the property. Many turn-of-the-century houses, built around 1900, have undergone renovation after renovation over the decades. When given the choice, homeowners have often opted for the cheaper option of covering over existing materials and services rather than removing them.
During this project, as with many others we have completed across London, we uncovered layer upon layer of tiles, plasterboard, lath and plaster, cork, vinyl, timber and wallpaper that had simply been covered over time and again. In one house in Islington, we found seven layers of wallpaper, while a flat in Battersea had four layers of bathroom wall tiles. In a house in Fulham, we uncovered five layers of lath and plaster with plasterboard fixed over the top.
With space at such a premium in London, every centimetre counts. Removing redundant materials not only creates a cleaner, higher-quality finish but also maximises valuable floor area. When property values are often measured by price per square metre, even small gains in space can make a significant difference.
Before
After
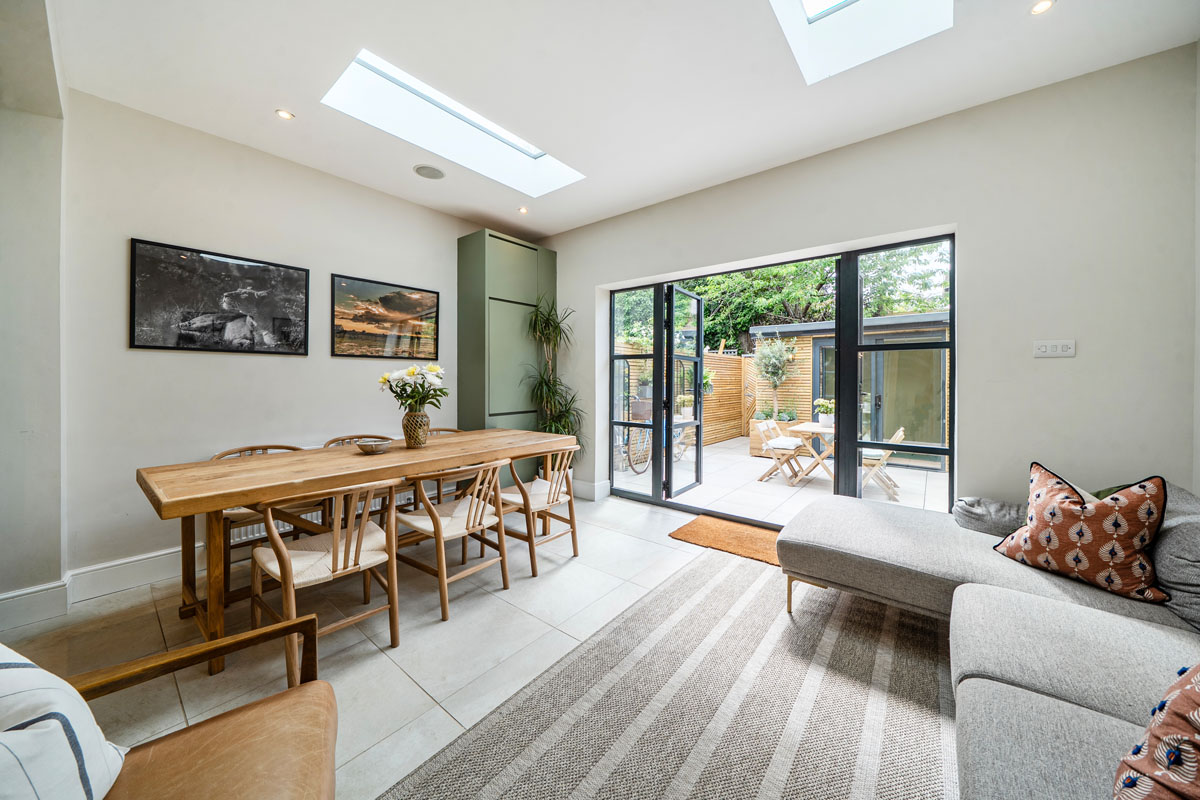
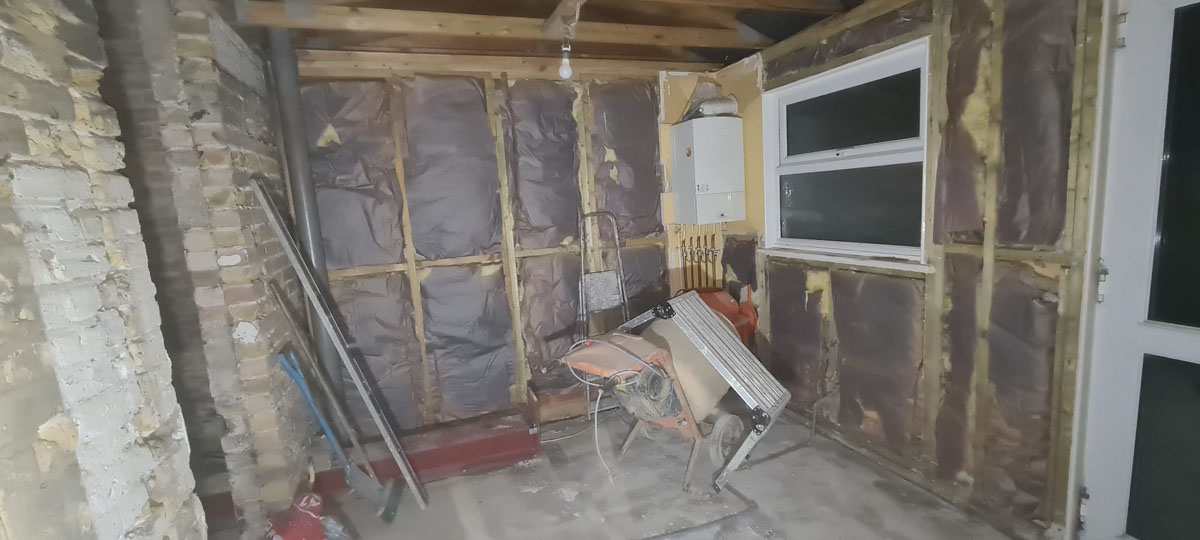
Stripping out a property, removing old materials and disposing of the waste can be a significant cost. On this project alone, we filled nine 12-yard skips and used five wait-and-load lorries to clear the site. Much of the waste consisted of old lath and plaster, thin strips of timber covered with a rough plaster reinforced with horsehair, a traditional building method that was widely used for centuries before plasterboard became the industry standard.
Although lath and plaster served its purpose for many years, it is heavy, extremely dusty when removed and fragile once disturbed, making it difficult to work around using modern tools. It can also contain hazardous materials, such as arsenic, and takes up considerably more space than today’s high-performance plasterboard systems.
On a renovation of this scale, the plumbing and electrical systems also need to be completely renewed. The most efficient way to install these services is with the walls, ceilings and floors fully exposed, allowing plumbers and electricians to work quickly and accurately. As skilled trades are a major part of any project’s cost, improving access helps to reduce both time on site and the likelihood of future issues.
Once lath and plaster have been chased out for new pipes or cables, it can be extremely difficult to repair to a high standard. Although carrying out a full strip-out represents a greater investment at the start of a project, it creates valuable additional space, removes outdated and potentially hazardous materials, provides unrestricted access for first-fix services and ultimately delivers a much higher-quality finish.
Before
After
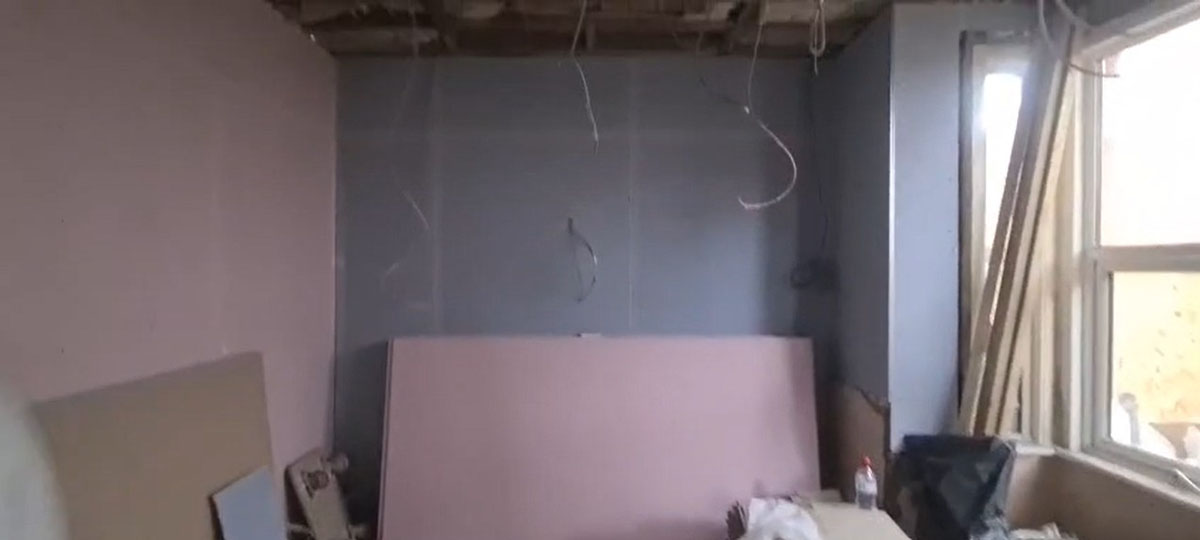
Modern plasterboards come with a range of properties and colours that indicate what they should be used for. Blue plasterboard has sound blocking properties, this is heavy duty thick boarding that is good for reducing sound between floors and on party walls and can weigh between 29kg – 37.5kg so installing it, is as you can imagine hard work. Pink is fire block plasterboard and is used for ceilings and compartmentalisation to slow the spread of fire between rooms. Green is moisture resistant and is used for bathrooms and kitchens where the plasterboard might become damp and has an anti-fungicidal chemical in it.
The classic way of sticking plasterboard to walls is called dot and dab, it is a terrible method and should be phased out. It is slow to apply, uses damp adhesive which you then lock in behind your drylining, it has no insulative or sound deadening properties, bags of adhesive are heavy to transport and add unnecessary weight to your building. WLP much prefer Soudal Soudabond plasterboard adhesive foam. You spray a mist of water onto the wall and the back of the plasterboard, then spray on the foam, wait for it to expand and then stick it to the wall. You have some time to adjust it to make it plumb and level, then once stuck it is solid as a rock. This spray foam adhesive helps to insulate your home and is fireproof. It doesn’t create any thermal bridging and helps to reduce sound bridging and finally it doesn’t lock moisture behind your drywall. The foam is also incredibly strong, much stronger than dot and dab adhesive; as WLP can attest, on rare occasions having to take boarding off and redo it.
Before
After
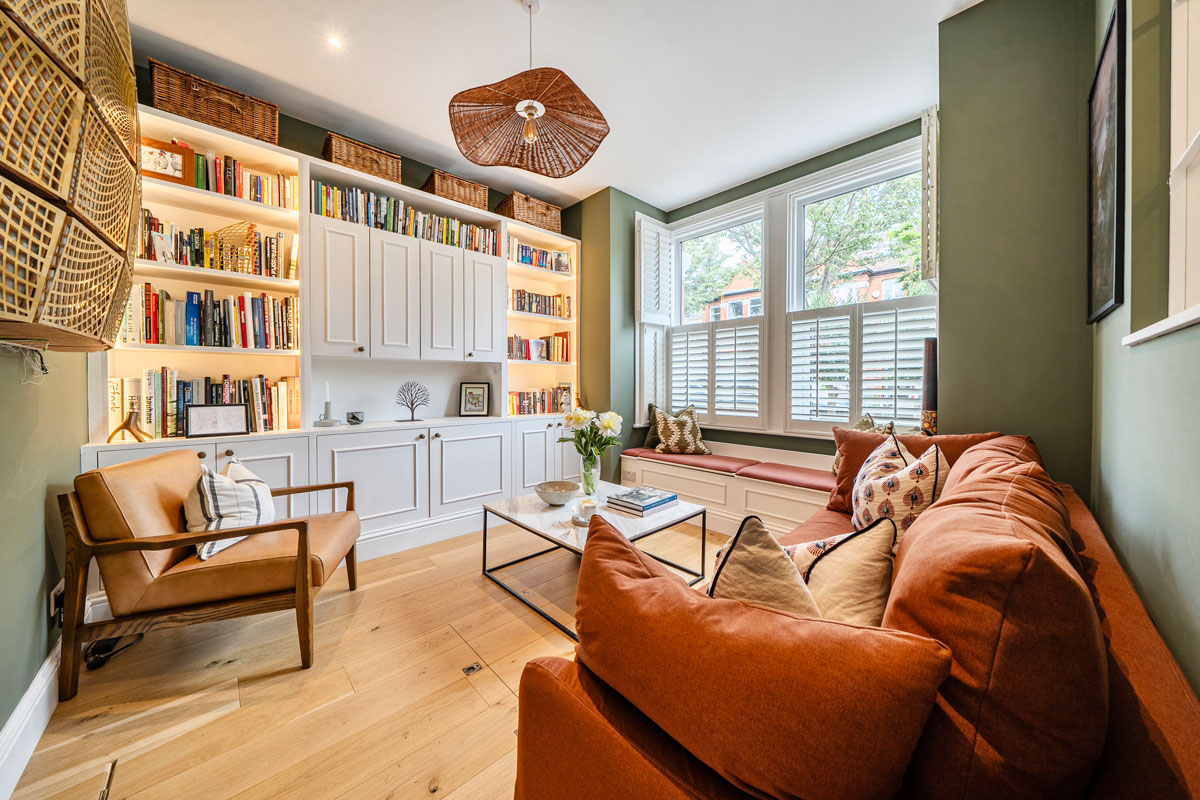
Planning is one of the most important parts of any building project. Careful thought must be given to electrical and plumbing first fix, joinery and even the final furniture layout. Installing cables and pipework before floors, walls and ceilings are finished is straightforward, but once these surfaces are closed up, making changes becomes time-consuming, costly and often requires repairs.
Throughout this project, many decisions had to be made at an early stage to keep the work progressing smoothly and avoid costly mistakes. Achieving this required good communication between the client, WLP as the main contractor, and all the trades involved.
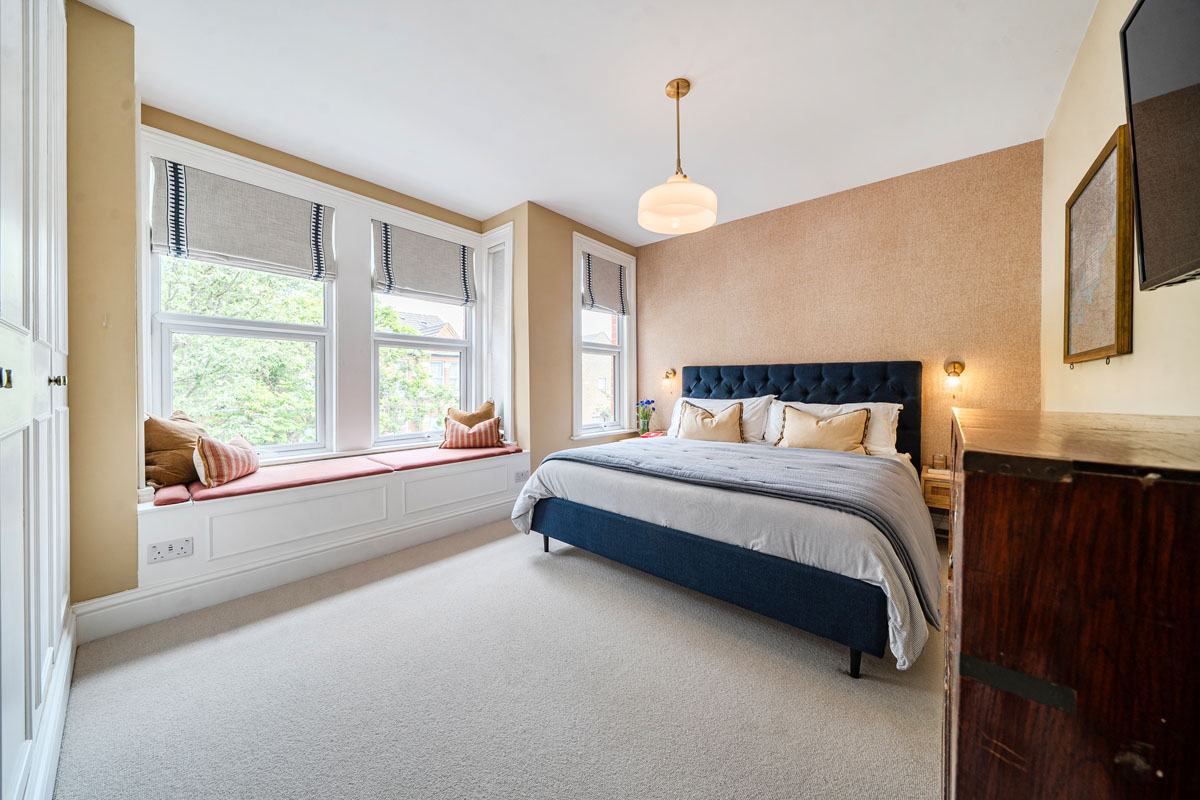
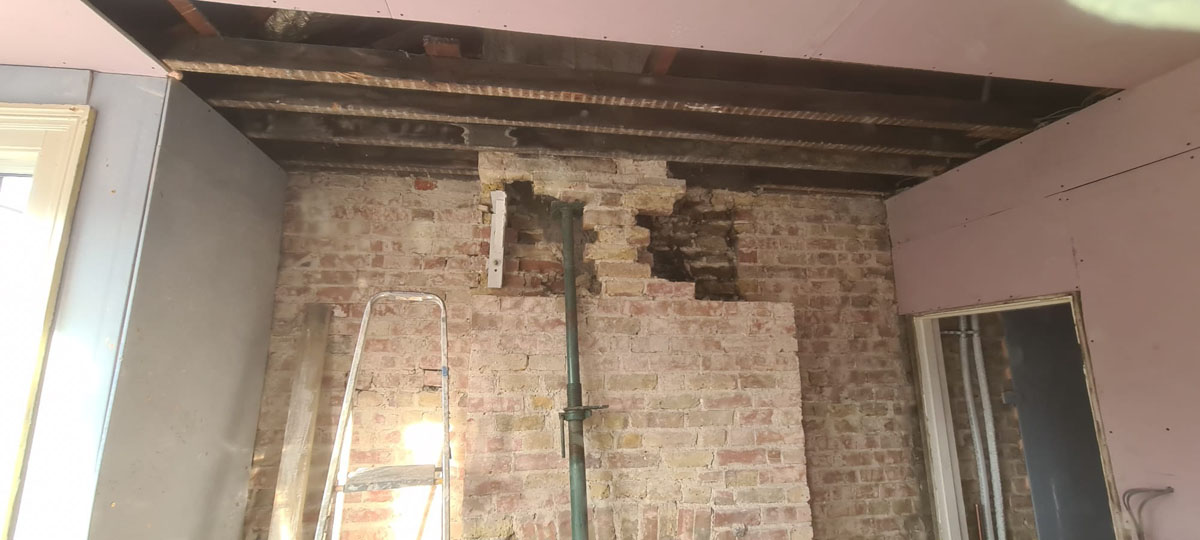
The living room is a great example of how careful planning contributes to a successful project. The client wanted bespoke built-in joinery to maximise both storage and visual impact, including a large bookcase and TV unit that conceals the television behind bifold doors. Before the plasterboard was installed, power and lighting had to be positioned accurately for the TV, while pipework for the radiator was carefully hidden behind the window seat with built-in storage. USB socket cabling also had to be installed within the bench seat. Planning these services early ensured everything was in the right place before the finishes were completed.
Before
After
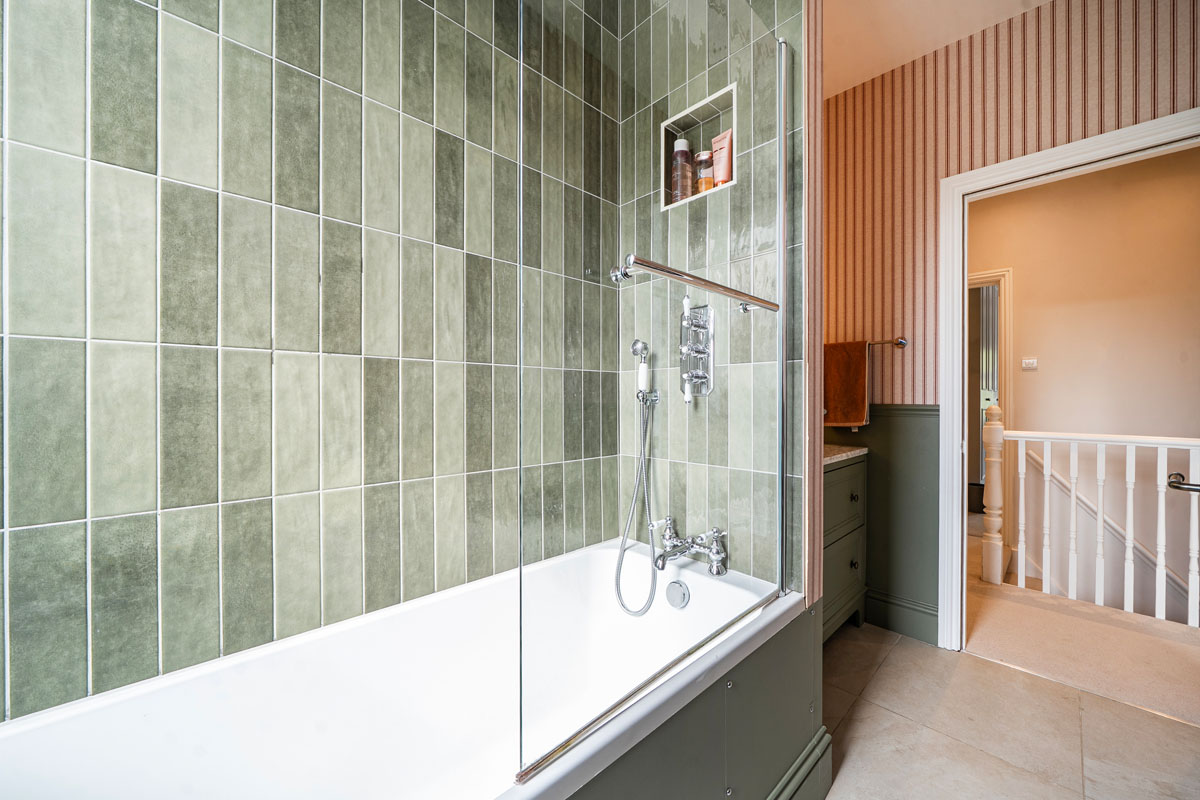
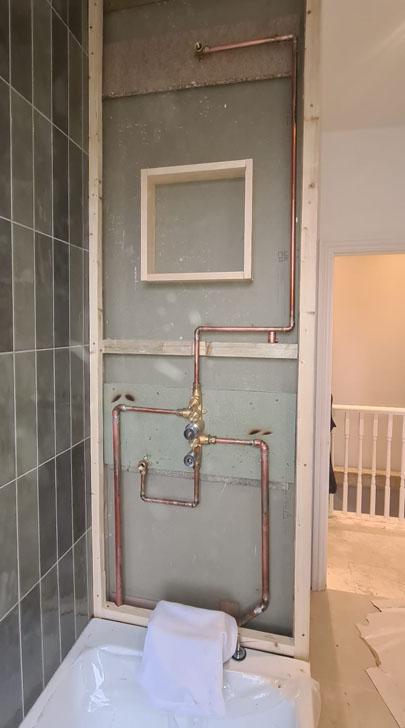
If electrics are the nervous system of a house, then plumbing is its circulatory system. Poorly installed pipework can lead to leaks, pressure issues, corrosion and condensation if pipes are not correctly insulated. Pipework must also be carefully marked and protected, as screws or nails from later trades can easily cause hidden leaks. For this reason, WLP keeps a photographic record of all pipe runs, particularly in complex areas such as shower mixers.
Features such as tiled shower niches also require careful planning. Pipework must be routed safely around the niche, while timber supports need to be installed in advance for the shower mixer, shower head and shower screen. Positioning the niche higher within the shower also helps reduce the risk of standing water, improving both drainage and long-term performance.
Before
After
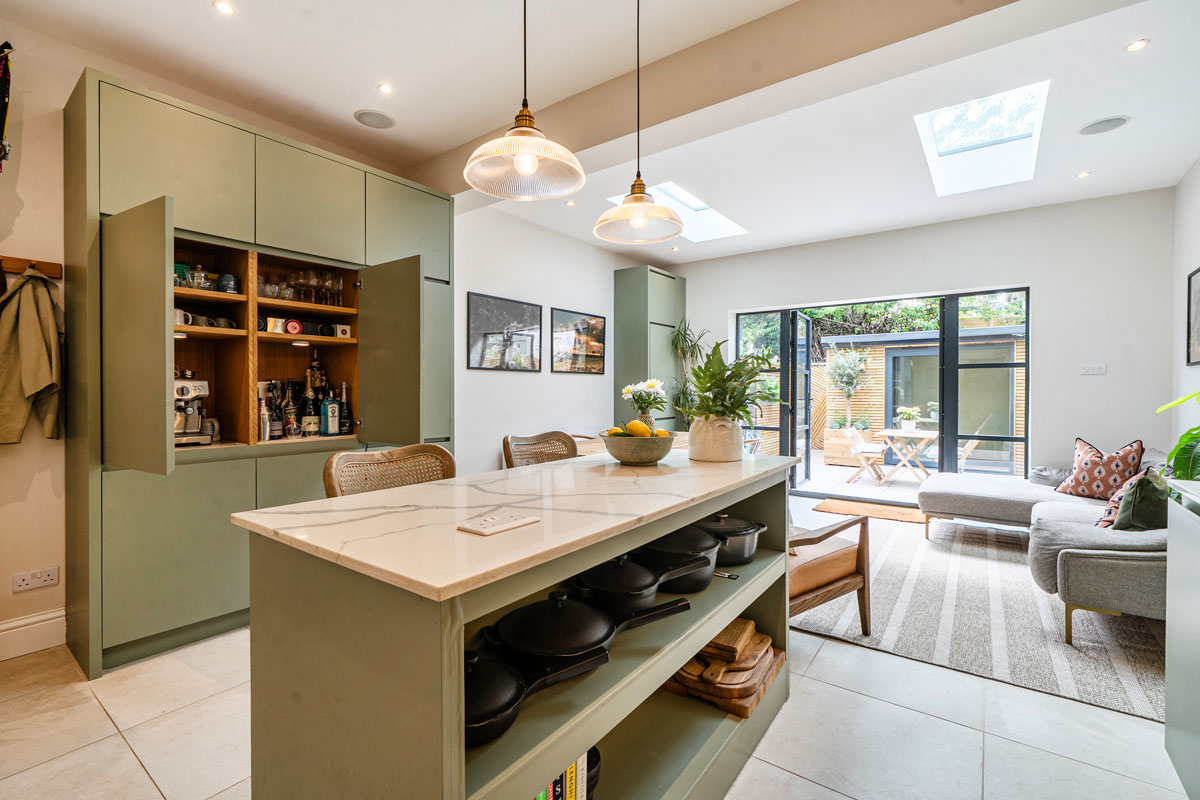
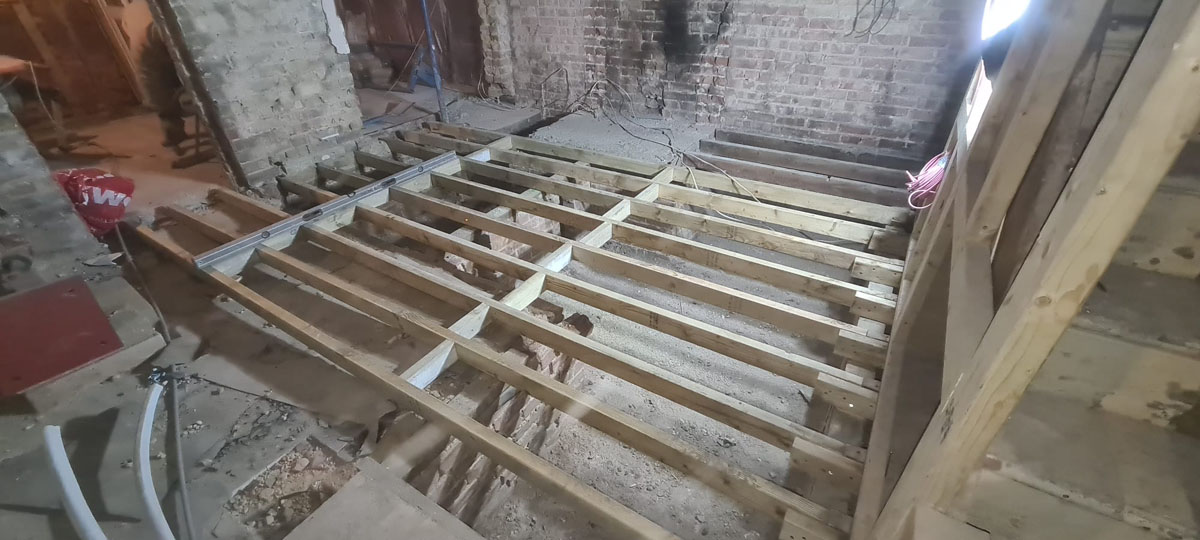
Before the beautiful finishes, lighting, wallpapers and floor coverings can be installed, a huge amount of structural work must first be completed. On this project, we faced several significant challenges. An extension built in the 1980s had been poorly constructed, with an undersized steel beam on the right-hand side beginning to fail. It had to be removed and replaced with an entirely new structural beam and column system.
We also discovered that the original builders had cut through the floor joists and filled the one-metre-deep subfloor void with construction waste to avoid the time and cost of removing it. Around 4.5 tonnes of debris had to be dug out by hand before the damaged floor joists could be rebuilt and strengthened using scarf joints.
Before
After
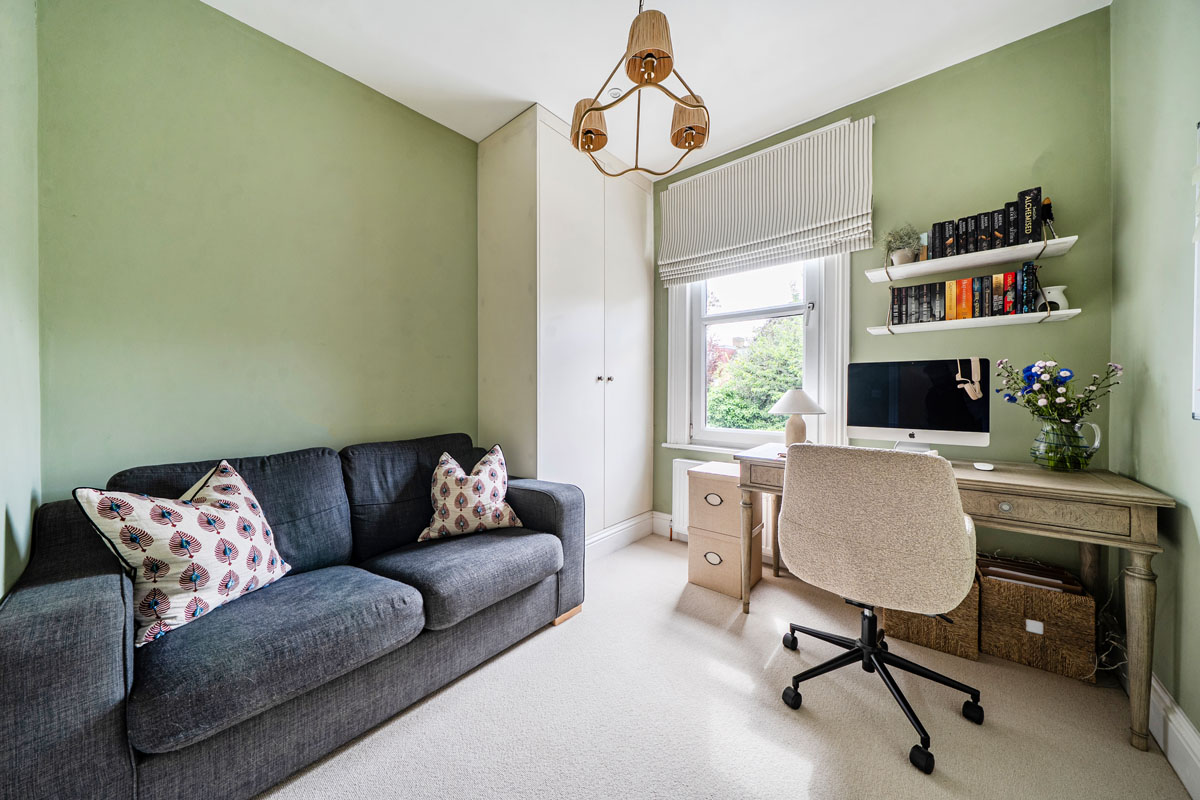
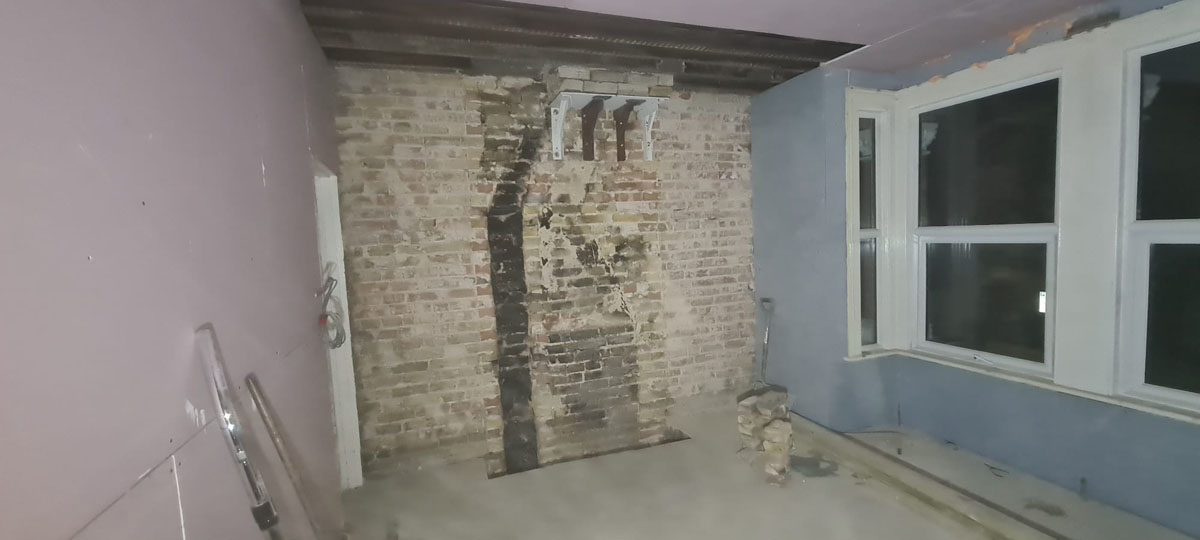
This project involved removing two chimney breasts from the kitchen and one from the front room, with the masonry removed up to roof level before the walls were carefully repaired and repointed. Chimney removal is labour-intensive, dusty work that often requires Building Control approval, Party Wall agreements and, in some cases, planning permission or listed building consent. Where the chimney stack is retained above roof level, structural steelwork or gallows brackets are required to support the remaining masonry safely.
While some homeowners still enjoy the character of an open fire or log burner, most London homes are now heated by gas-fired or electric central heating systems. Removing redundant chimney breasts can transform a cramped layout, creating valuable floor space for modern living, bespoke joinery or improved room layouts, while also increasing the property’s usable floor area and value.
Before
After
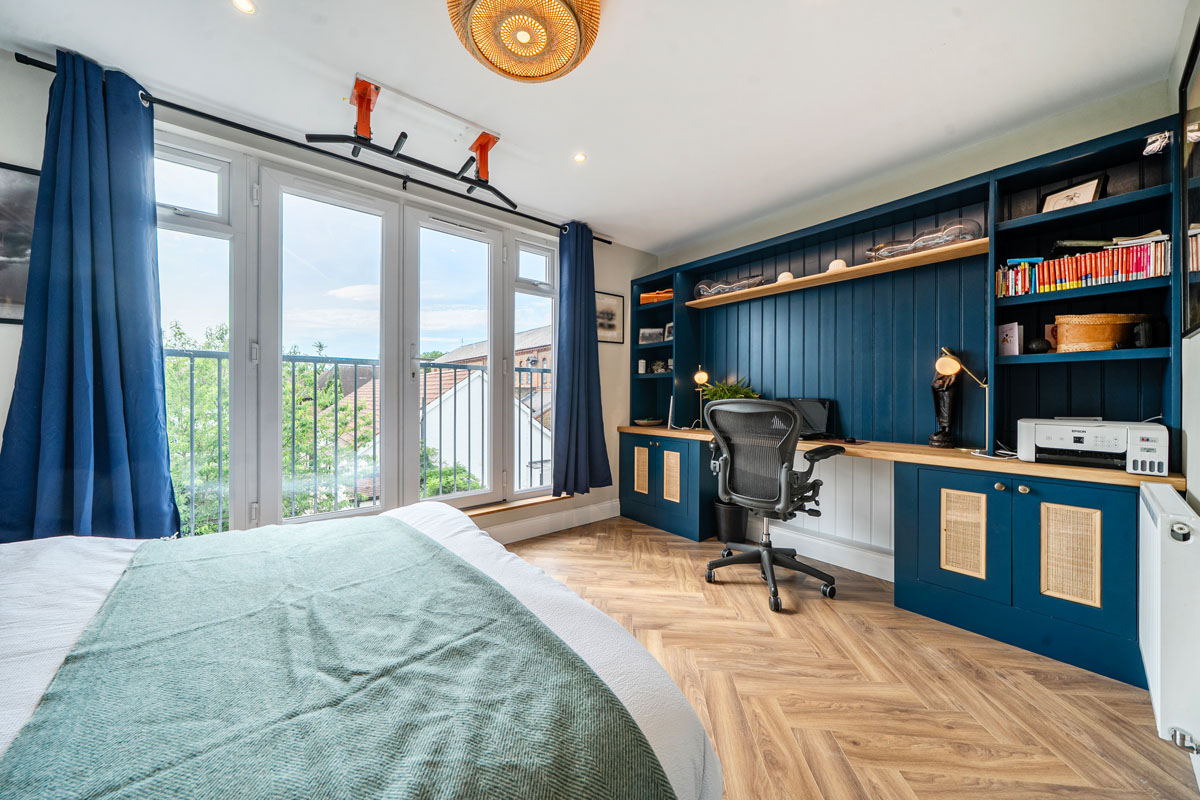
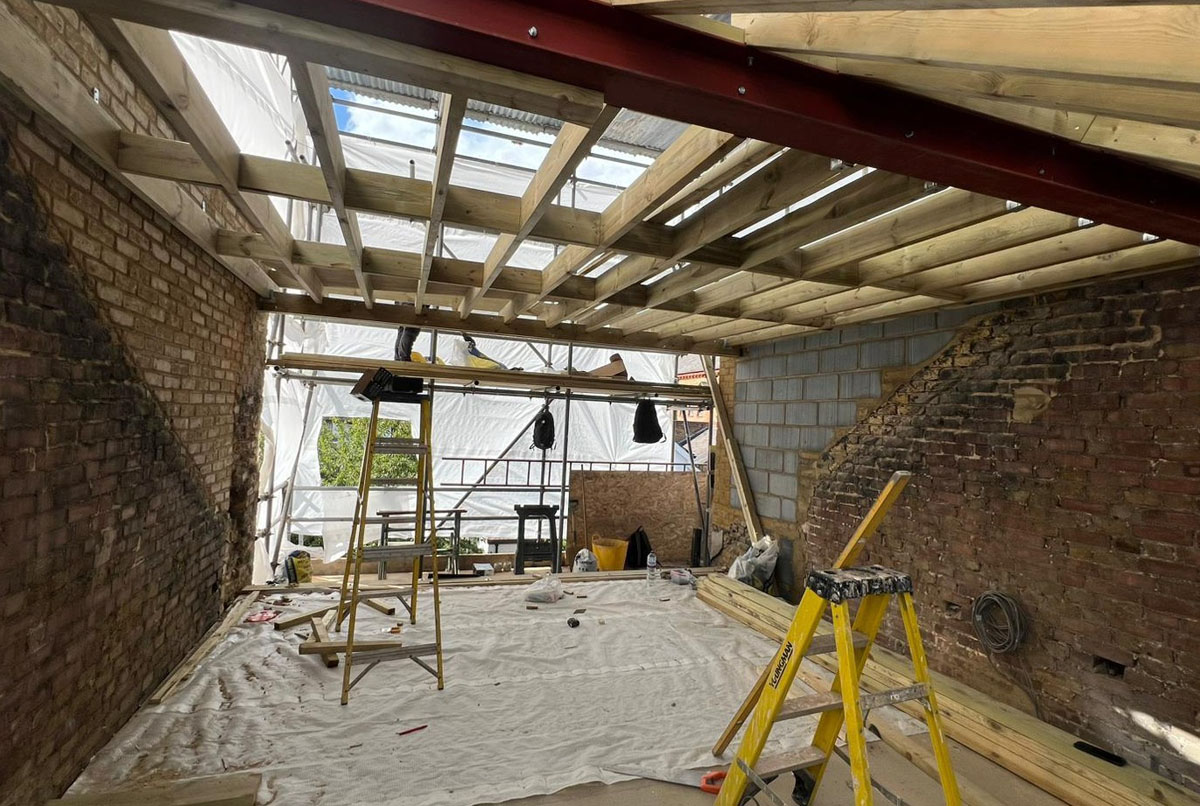
The structural strength of a building, particularly in period properties, is hidden behind the finished surfaces. Structural steelwork, timber joists, blockwork and sheathing are all essential elements that are rarely seen once a project is complete. The planning, coordination and craftsmanship required to install them are often overlooked unless clients experience the build process firsthand.
At Wrigley Landon Properties Ltd, years of experience, careful planning and attention to detail go into delivering every high-quality finish. We hope this behind-the-scenes look has given you a greater appreciation of the work involved in creating a beautiful home.
We wish you a wonderful summer. If you are planning a major renovation, or know someone who is, we’d be delighted to help. Please get in touch at info@wrigleylandonproperties.co.uk.
Best regards,
Henry & Edward
Wrigley Landon Properties Ltd
info@wrigleylandonproperties.co.uk
Gallery
Design
We work closely with architects and interior designers to help clients realise their vision. Whether you want a modern, minimalist, or traditional style, we can assist you with the design process and our expert advice.
Manage
No matter how big or small your building project is, WLP has the skills and experience to make it happen. We work with you to understand your needs and deliver results that match your vision in a timely manner.
Build
We cover every aspect of building your dream home or office. Whether you need a new bathroom, kitchen, extension, or loft conversion, WLP can deliver any building project with quality and efficiency.
Maintain
WLP aims to help maintain your property in good condition. Providing plumbing and electrical services to prevent any issues or emergencies. We cover all aspects of planned and emergency maintenance.


